A magical morning with a little nature and lots of French toast.
This morning after checking out the baby birds in our nest, it was time for breakfast. French toast is her fav so that’s what I made. Here is the recipe:
2 slices of your favorite bread (I like Italian)
1 egg
1 tsp of sugar
1 Tsbp of water
Butter

Whip up the first 4 ingredients in a small bowl and set aside.
Melt a tablespoon of butter in fry pan until it sizzles. Dip bread, each side in the egg mixture and place in pan until brown, turn, brown again and serve.
Garnish with a little mint. (I have a metallic heart dish for my little girl)
Before cooking, Sage and I ran out to the yard to pick some mint. She was quick to pick up on the fact that it is lemon mint and smells soooo good. When I told her we would garnish the toast with the mint leaves she said “You’re fancy!” I said, “Yup, nothing but the best for my girl.”
Do you have something special you cook for your grandchild or little one?
We have a bird’s nest and babies!
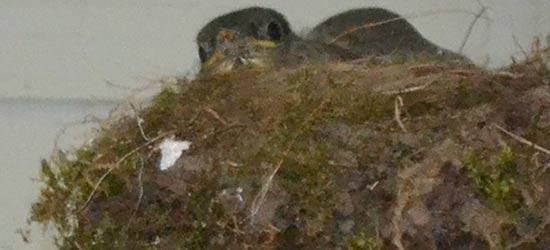
When I first saw it, it had the look of perhaps a hornet’s nest. I thought about removing it and yesterday afternoon my granddaughter came running to me. “There are baby birds out there!” Sure enough, we have babies. So cute. I’ve not seen the mother yet so I don’t know what they are. There are two though and they can already fly, so we won’t have them too much longer. I’ll just enjoy them while I do. It’s fantastic to have my granddaughter watch nature. She loves to go to the garden and see what is growing too. Ahhhh, life!
Cause they’re so darned cute. I couldn’t resist making cooing noises and trying to get close. I know the little creep was trying to get at my lettuce. Good fences make for happy gardeners. I’m thinking he can’t get in there. Harumph!
As with all plans the actual garden layout changed up a little bit. All in all it turned out very well and the plants are looking happier than I have seen them the first week of June. Except that the plan for 6 tomato plants turned into 9…I can’t resist those heirlooms.
With the exception of the last of the potato seedlings, yes I know, I’m late; it’s time to move on to the rest of the landscape. Now let’s see what kind of trouble I can get into out there….I could hide some radishes in there and a few Brussels sprouts perhaps?
Do you plant edibles in with your flowers and shrubs? What do you camouflage in there? Make it something the rabbits can’t find.
Discover The Renaissance City.
Providence, Rhode Island where rivers light up the evening and smoky air mingles with gentle music. Human statues puzzle passersby “Did that statue move?” Take a step back in time. An entire city transforms when the sun goes down, the river cauldrons are lit on fire and the gondolas drift by.
My Coastal Muse is planning a tour of the ocean state this fall. In addition to the romance of Waterfire you’ll take in her foliage while dining on the Newport Dinner Train. Ride on Ocean Drive and see the home where Jacqueline Kennedy Onassis grew up. Tour a mansion, take in the breathtaking view of the ocean cliffs and look inside the aristocratic lifestyles of the Rockefellers, Vanderbilt’s, Astor’s and Carnegies.
You’ll tour Federal Hill, Rhode Island’s Italian community rich with gourmet restaurants and small markets packed with Italian delicacies. Relax for a drink in the square and if you dare stroll into Antonelli’s Poultry where locals pick out their chickens live and return a short time later to bring them home. Enjoy an authentic Italian lunch before returning to your hotel for a short rest, cocktail party, buffet and then on to the Trinity Repertory Theatre for a spectacular performance.
Experience the freshest seafood, the finest restaurants and even a bit of Rhode Island’s gourmet food truck fare.
Tour will be in the fall, dates to be announced.
To receive updates on dates, travel arrangements and reservations:
[contact-form][contact-field label=’Name’ type=’name’ required=’1’/][contact-field label=’Email’ type=’email’ required=’1’/][contact-field label=’Website’ type=’url’/][contact-field label=’Comment’ type=’textarea’ required=’1’/][/contact-form]
| Container Gardening, of course!So many of you have limited space or limited mobility yet want to grow your own veggies. One of my dear friends lives in Hawaii where one would think the year-round growing season is a gardener’s heaven. For her, there is a volcano vent problem and growing in it not an option. That means she has to grow in containers. Especially for you Carrie, this article showcased by one of organic gardener’s heroes, Seed Savers Exchange, has some answers for you. |
Seed Savers Exchange Showcase:
|
| These are some of the best solutions I’ve seen for container gardening. Although in New England it’s a little late to start from seed in June, some hearty plants from the nursery will take off nicely and still provide you with ample fruit.Let us know how you are doing with your container gardening. |
Do you know how to sex a lobster?
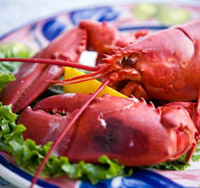
My Memorial Day treat this year was lobster. . I purchased at them Shaw’s Supermarket since they were on sale; $5.99 a pound who could resist?
I’ll give you the scoop on how to dissect those bad boys, it can be a challenge. And I say boys because that is exactly what they are. The clerk is always thrown when I request only the males. I get this deer-in –the-headlights look every time. The reason for males is simple; it has to do with cooking time. You see, the females have roe in them. I’m sure you’ve seen it. It’s that bright coral colored mass just above the tail. Now this isn’t red when raw, it’s actually black and gross looking. It turns red when cooked. The challenge becomes how much to cook them. If I cook them long enough to assure that the roe is coral color (and not black and slimy) the delicate tail meat is then over-cooked. So by choosing only the males, I side-step that total issue.
Now the question is: “Lady, are you nuts? How can you tell the sex of a lobster?” Here is how:
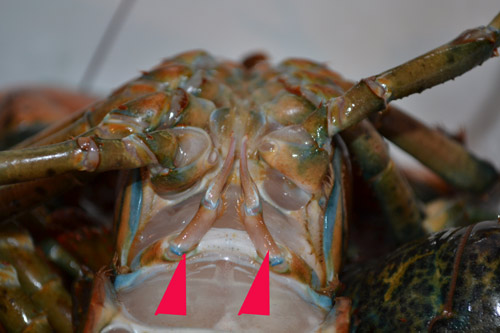
Look at the set of appendages at the base of the lobster’s tummy. (These are the small feathery fin-like things on the underside of the tail.) The first pair of swimmerets closest to the body is hard and bony on a male; the female’s are soft and feathery. Makes perfect sense, huh?
Next I put them in the freezer for a half hour. This puts them into a lethargic state so they are unaware of the cooking to come.
There are many choices on how to cook your lobster. The most delicious way is on the grill. Since I don’t yet have my grill (replacement for the one that went curbside last season), Steaming is a good option. Stuffed is awesome, but it’s a little more work and today I’ll forgo that.
I put about 2 inches of salted water in the bottom of a large kettle and bring to a rolling boil. Next add lobsters quickly, one at a time. Cover the kettle and return water to boil and begin timing. Allow 13 minutes for 1 pound hard-shell lobsters. Add 3 minutes per pound for each additional pound. When the antennae pull out easily, the lobsters are done.
Note: If the lobsters are new-shell lobsters with soft shells (“shedders”), reduce boiling or steaming time by three minutes. I prefer not to have the soft shell lobsters.
While the lobsters are being put to sleep, create your garlic butter.
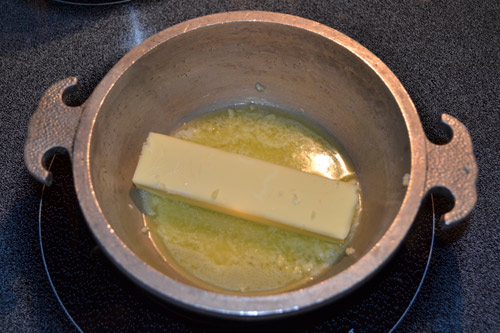
I like to clarify the butter. Crush a clove of garlic for each stick of butter. Now add to butter and melt. Pour into a glass measuring cup. Two people, one stick is fine. Let sit for 5 minutes and skim the foam off the top. Next pour the remaining butter into another receptacle leaving the milk solids that have settled to the bottom. There you have it. Done and the lobsters are still at the spa going to sleep.
If you are making accompaniments, prepare them now. Salads, fries or whatever. I personally don’t often make fries, but with lobster I like them. So fries and salad is my choice to accompany today’s lobster. The principle is to have everything ready, table set and cook the lobsters last.
Finally, how do you attack that bad boy and eat it? Well here you go.
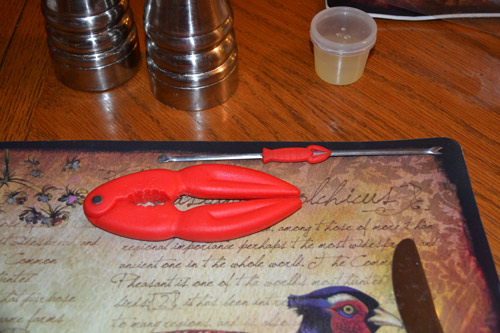
Be sure to have each person armed with a sturdy lobster/nut cracker, small pick and plenty of napkins. Provide a bowl for shells.
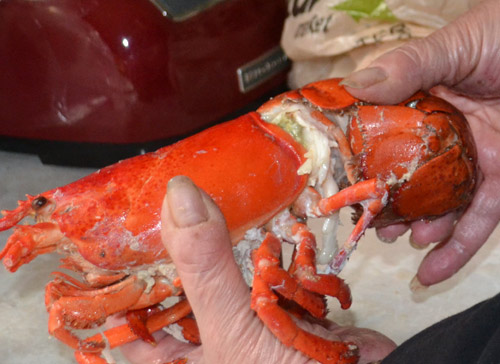
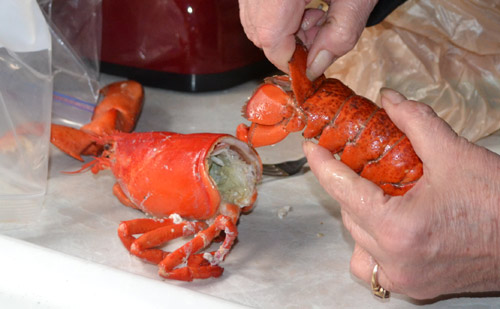
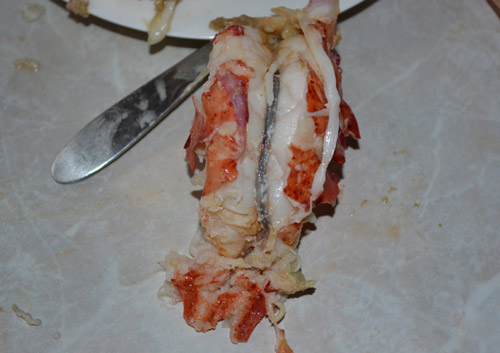
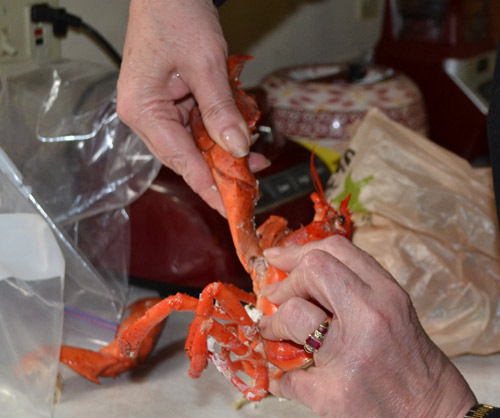
Once the lobster is cool enough to handle remove the claws and set aside. Next remove the tail. Grasp the body in one hand tail in the other and twist. At this point you may see some of the green tomalley on the meat; this is a delicious delicacy the remainder of which is inside the body cavity.
The tail is my favorite part so I eat it first. Insert your fork just inside the shell between the meat and the shell. The shape mimics the shape of the fork. Give it a twist and pull the meat out. I always pull away the flap on the back of the tail and remove the black membrane; it mostly pulls away in one piece, discard. The flap itself is edible and a tasty part of the treat.
There is sweet meat inside the walls of the body cavity. Avoid eating the feathery parts but in between there are pockets of meat. They are a challenge to get at but worth the work. This is where you can enjoy the remainder of the tomalley. Often it occurs that a friend turns up their nose and says yuk! I never try and convince them otherwise, I just enjoy theirs.
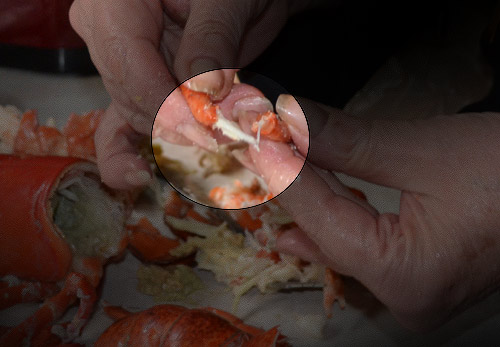
There is meat in the small feet if you are patient enough to get at it. I twist the leg in half and 8 out of ten times the meat slides out of one side. If you are so inclined eat the meat and then suck the meat out of the remaining side. I’m not sure what Miss Manners would say about that; here in Rhode Island it is perfectly acceptable.
Finally, the claws. Break at the knuckle joints using your lobster cracker break open the shells to get the meat inside. Some people consider this meat the sweetest. You will need to use your small pick to get into the knuckles to retrieve the meat.
Yummy! Enjoy!
Do you cook lobster at home? Share your recipes.
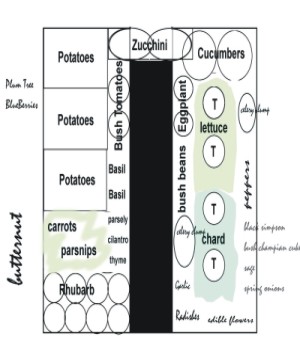 Finally! The garden plan. “I’ve got it all figured out, now to get my plants ready. ” I finally finished mine late last night. This will be my 4th year raising my vegetables and from year to year success rate is quite different. Year 1…fantastic! Year 2…a little less fantastic (was I attentive enough?)…Year 3 was a disaster and her I am on Year 4. Why was year 3 so bad? I was late getting my plants in and they were really overgrown for the pots and pretty beat up. Then I had an infestation of some kind of savage beetle. They looked like Lady Bugs only a little more yellow; there was nothing ladylike about them. Every leaf in the garden looked like fine lace with yellow orange bug dots on them. Don’t know what they were but “Mamma no like!” This year I’m searching out something organic and lethal to these critters. Weeds were another inherent problem that comes with living at the edge of a forest. I’d been using landscape fabric but this year I’m trying paper on half the garden and hay on the other. It’s a learning curve. Another standard instruction to beginning gardeners is to give plants plenty of space. Recently I came upon a book that talked about creating a garden based on the ecostructure verses horticulture. The author says that vegetable plants need to be in close and create an ecosystem. Plant ground-covers of Swiss chard and lettuces in every empty space. They will drown out the weeds and are yummy too. So, here is my 10 foot square garden bed next to my 4×10 rectangular bed (charted for fruit but will share with butternut squash this year) For my next trick…I’ll share my plan for pretty vegies that I can incorporate into my decorative garden beds. But that’s for another post. –Gardening in the Suburbs, a life all its own.
|
Have you done your garden layout yet?Putting it all out on paper is very helpful, it helps me keep everything straight. Usually the plan changes a little bit when I actually get out there.Try it and let me know if it’s helpful. |
Are you ready for your first step? Well, I did it. Sure I was 15 minutes late for work but I started my day with a success. A golden nugget has been collected on my road to Oz.
The bushes are well trimmed. Wish I had taken a “before” photo, they were pretty wild. I’m told NOT to prune roses in the fall. Doing so sends them the message to create new growth. The young tender branches would not survive the winter and ….I don’t know what.
Whatever; it’s a safe bet the outcome would be bad.
Every journey begins with a single step. Mine begins this morning with the rose bushes.
I got them trimmed, retrieved my barrels from the curb, dumped the mess and put my gloves in the proper spot. Yes, a single step, I am glad you are walking with me.
The Nuts and Bolts
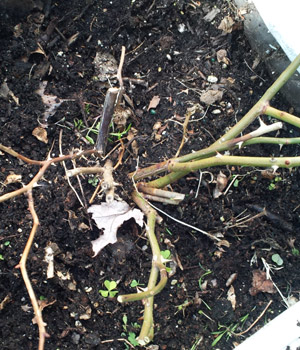
Early as it may be, Memorial Day Weekend crash lands in 3-days. I was a little surprised that I didn’t see any growth at all on the bushes.
The first one seemed really dead, not sure but didn’t look good. The next one proved my theory, it was far greener with a bit more life.
I will be watching how they grow…if they do…over the next 2 weeks. Meanwhile tomorrow morning I’ll get those little weeds out of there and put a little mulch in the pot…they will look much better.
Yeah, the little green you are seeing is sadly, weeds.
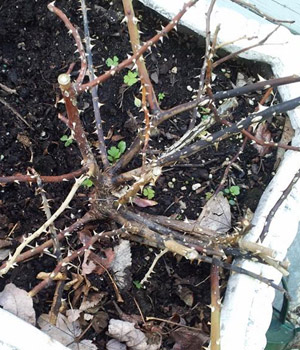
Compare he dryness of the first bush to the one below.
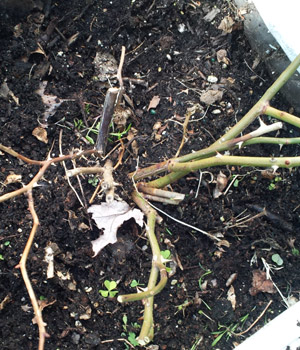
The second bush clearly has a better chance

